 Here, in this the second installment of First Aid for Preppers, we are attending to sprains, strains and broken bones. In the rush to reach safety or to secure the home during an emergency, it’s all too easy to make a mistake, take a misstep and end up with a sprained ankle or pulled muscle. Of course, we can’t rule out a broken finger caused by a heavy object dropped from an unsecured load or a cracked fibia after a less than eloquent fall from a ladder. This is what to do when they happen…
Sprains and Strains
ITEMS NEEDED:
- Cold pack or compress
- elastic athletic wrap (Also known as Coban)
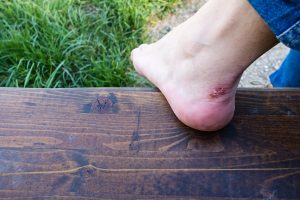
Sprains and muscle or tendon strains are usually more annoying than anything else, an injury that’s barely an injury, something you’re told, “Walk it off”. But then there are those sprains or strains that might as well be a broken ankle or knee for all the pain they cause. The limb or joint is rendered worthless, unable to bear any weight whatsoever. In those cases, don’t push yourself as doing so will only make the injury worse. Instead, RICE… Rest and ICE it. Ice the injury with a cold pack or snow or even cold water to reduce swelling. A bad sprain will swell. Rest and ice the area for a good 20 to 30 minutes then remove and let it warm back up on its own before testing to see how it handles body weight. If it is still sore wrap with an ace bandage or other elastic athletic wrap. Wrap snugly but not enough to cut off circulation.

Broken Bones and other Appendages
ITEMS NEEDED:
Sturdy supports appropriate to the size of appendage– limb splinter or a SAM Splint
padding material
strips of cloth or other material for tying supports and padding around the fracture
A broken bone can be as obvious as a compound fracture with the bone protruding through the skin, a limb bent at an unnatural angle or as hard to diagnose in the field as a hairline fracture possibly mistaken as a bad sprain. If the area is painful, cannot support weight and swollen, err on the side of caution and treat the injury as a broken bone. It will need splinting to prevent further damage.
Broken Arm:
1) In the case of a broken arm, leg or other appendage a splint can be cobbled together by employing anything that will act as rigid supports to the break and securing them into place with wrapped or tied cloth or other any material that will do the job. Do not try to straighten the limb as this will likely cause more damage.
2) Splint with the break. The priority is to immobilize the break, to prevent more pain or injury, until the victim can receive medical attention.

A Note to Remember: A basic rule of thumb for splinting is to immobilize the joint above AND below the broken bone. If the lower leg is broken, splint the ankle all the way to above the knee.
Broken Finger:
1) Locate two supports approximately the length of the finger, anything from a couple of sticks (not so dry that they will break) or two popsicle sticks or anything that will provide support.
2) Place supports on either side of the break or the best position to keep it from moving. Again, do not attempt to straighten the finger or any broken appendage.
3) With strips of cloth wrap around the finger, securing the supports to the finger and tie the ends into knots neither directly over the break or so tight that circulation is impaired. Sturdy medical or athletic tape can also be used in place of cloth strips.
Broken Forearm:
1) Locate material that will serve as padding between the rigid supports and the arm. This can be anything that is not excessively bulky from a t-shirt, socks or a small towel. With care, wrap the arm.
2) Place a ball or a rolled up sock under the patient’s palm. This position tends to alleviate pain and increase comfort.
3) Locate a rigid support such as a sturdy, flat board, styrofoam padding, sturdy cardboard, a SAM Splint or anything rigid enough to prevent movement and long enough to support the hand.
4) Wrap with wide strips of cloth, above and below the break and around the hand. An ace bandage will also work well for this purpose.
5) Check blanching (capillary refill) by pressing on a fingernail until the skin underneath whitens and release, noting how fast the pink color returns. If slow, the binding may be too tight.
6) Make a sling (or purchase a sling for your stockpile or bug out bag) with a doubled, triangle piece of cloth or small blanket. Place the arm inside, bring the arm around to the front of the body and tie the ends around the back of the neck.
7) Tie another length of cloth above the elbow (mid-humorous) and around the torso to further secure from unwanted movement.
Broken Leg:
1) As with the other two examples, a sturdy support is needed but more substantial given the size of leg bones. These can be two 2x4s, thick blankets rolled up, medium sized branches or any other found items that will provide the support needed.
2) As with the arm, wrap light padding around the leg with firmer padding placed behind the knee (a rolled up shirt or the like) to keep the leg slightly bent.
3) Bind the leg with strips of cloth or other binding material. Tie above and below the knee but not directly over the break.
4) Check capillary refill as described in arm splinting or by pressing on bare skin to see if bindings are too tight.
If the break is an upper leg fracture the splint will need to extend up the entire leg, up to the arm pit, wrapped along the length of the leg and across the torso across several points.
A Note about CPR
While there are step by step instructions for performing CPR, it is highly recommended that you consider taking a course through any of the numerous community provided trainings taught by certified instructors. This is truly the best route to learning the skills and techniques required to perform this area of first aid.
Stay tuned for a third installment of First Aid for Preppers when we’ll tackle aid for traumatic shock, figure out the differences between hyper- and hypothermia. Then watch out for how to treat insect and animal bites and what to do when gastrointestinal illnesses strike in the our fourth and final installment.
If you missed the first installment of this series, visit First Aid for Preppers – Part 1: Blister, Burns & Nasty Wounds or check out other Emergency Essential Supplies and First Aid Kits.